It wasn’t until the late 1980s that the radiotherapy immobilisation mask in New Zealand was manufactured using the holey, opaque, thermoplastic product that is used today. Prior to that it was a much more messy and time-consuming process to make a mask.
It was a four-step process:
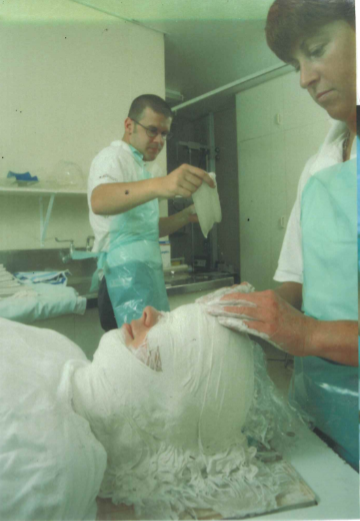
STEP 1: Taking a Plaster-of-Paris Impression
The “mould-room technician” would first select an appropriate neck-rest to position the patient’s head for the specific treatment that they were to receive. The neck-rest fitted securely into a specially designed base-plate which will sit on the treatment couch.
Hair is covered with a tubular gauze bandage of paper hand-towels smothered with “barrier cream” which is also liberally applied to the face, ears and neck, before the technician commences taking the impression using three layers of warm, wet, folded, overlapped plaster-of-paris bandages. Men’s facial hair was a real challenge – glad-wrap was used to protect the hair and technician skill was required, especially in phase two, to ensure a close-fitting mask.
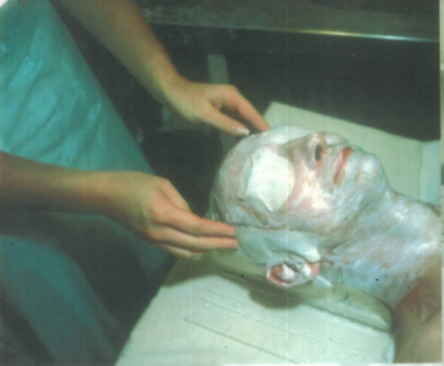
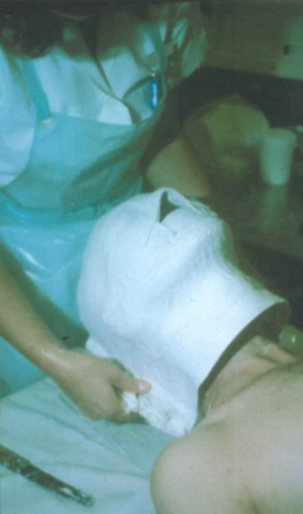
The impression was taken from the top of the forehead, over the entire face, over the top of the nose, which is kept free so the patient can breathe, and down the neck. It goes over the ears, down both sides of the head and neck-rest, down onto the base-plate. Occasionally if the patient cannot breathe through their nose the mouth is left uncovered.
As the bandages dry, they become extremely hot, which was always an added stress for claustrophobic patients!
Once hardened, the plaster-of-paris impression is carefully removed and after cleaning up (it is a messy process) the patient leaves with an appointment 2 – 3 days later to have their mask fitted.
STEP 2: Making a plaster bust
Meanwhile the technician proceeds to manufacture a “plaster bust” of the patient’s head by mounting the bandage impression onto a solid plastic board. The nose and neck are covered with more plaster-of-paris bandages, creating a hollow head and face mould.
The mould is filled with a thickened mixture of loose plaster-of-paris, making sure there are no bubbles, which would leave holes in the finished bust. The bust is left at least over night to solidify, harden and dry.
The plaster-of-paris bandages are carefully removed, making sure not to damage the nose and ears. The technician then smooths the dry plaster bust, carefully scraping off any overlapping plaster bandage lines, repairing any anomalies (occasionally an ear can break off and needs to be reattached and smoothed) and correcting for beards / moustaches / bushy side-burns etc, to create an exact replica of the patients face and neck.
STEP 3: Manufacturing the Perspex mask
The dry plaster bust is placed on the table of a specially designed vacuum former and lowered. A large piece of clear perspex, several millimetres thick, is locked into place on the vacuum former and heated. The technician’s skill is once again required to ensure that the perspex is heated to the right temperature, before the table containing the bust is raised and vacuum is gently applied, so the perspex forms tightly over the bust.
The perspex cast and bust are removed from the vacuum former and an oscillating saw is used to cut out the mask and remove it from the bust. The edges of the mask (including a breathing hole in the nose) are smoothed using a scalpel and acetone.
STEP 4: Fitting the Mask
At the patient’s mask fitting appointment, mounting struts are attached to both sides of the mask with acetone, so it can be comfortably and securely locked onto the base-plate containing the neck-rest.
The patient and mask are now ready to proceed the simulator machine for x-rays to be taken and for the mask to be marked up – the first step in the treatment planning process.
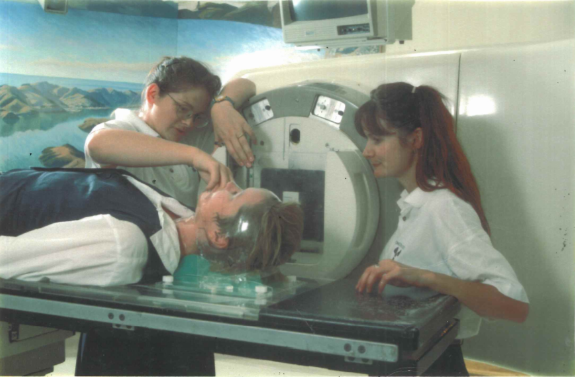
From the early 1980’s CT started to be used to inform planning for head & neck cancer patient’s treatment; however that involved a separate appointment in radiology, attended by the simulator radiation therapist (we were called radiotherapy radiographers in those days) who would position the patient on the CT couch in their immobilisation mask.
I first saw thermoplastic being used to manufacture radiotherapy immobilisation masks in the UK in 1986 as a trial new product. We were not sure how it would be tolerated by patients, being opaque, compared with the transparent perspex masks. However, trials soon demonstrated its value and acceptance. It was adopted in New Zealand in the late 1980’s and has revolutionised the process both for patients and radiation therapy staff.
Thanks to one of our head and neck cancer community for contributing this piece. It will eventually go on our website headneckcancernz.org with a piece on the present mask and the possible future of the mask.